[Jenkins] Jenkins Pipeline
July 2024 (771 Words, 5 Minutes)
Exploring Jenkins - Part 2
In this post we are going to understand the Jenkins Job with a pratical implementation.
Running the Jenkins Docker image
Instead of installing and setting up a Jenkins environment on our host device, let’s play with it on a Docker image first. There is a Docker image specific for running Jenkins already on Docker Hub.
Let’s pull the image with docker pull jenkins/jenkins:lts-jdk17 and then run it with
docker run -p 8080:8080 jenkins/jenkins:lts-jdk17.
We can now access the web interface from localhost:8080.
It will redirect us to the Jenkins installation. Copy the password printed on the terminal and paste it in the required field of the web interface. Then choose to install recommended plugins.
Running our first Job in Jenkins
Since we are just testing for now, we can skip the highly recommended step of setting up a Jenkins agent.
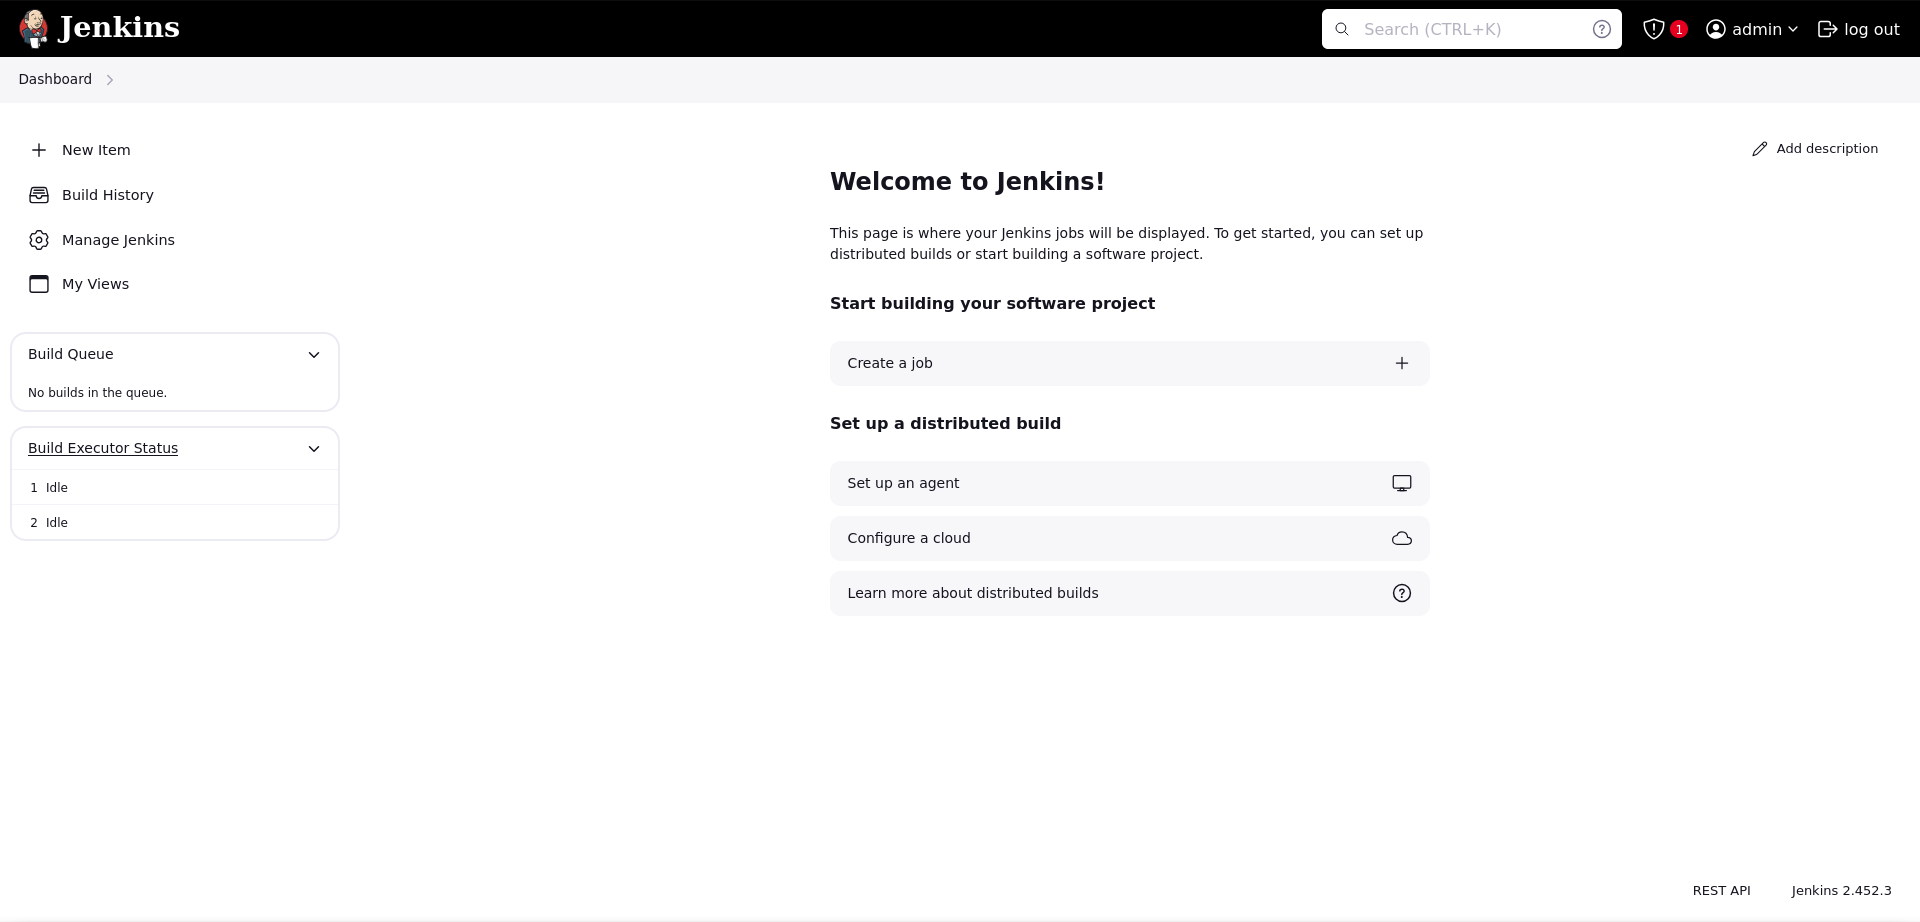
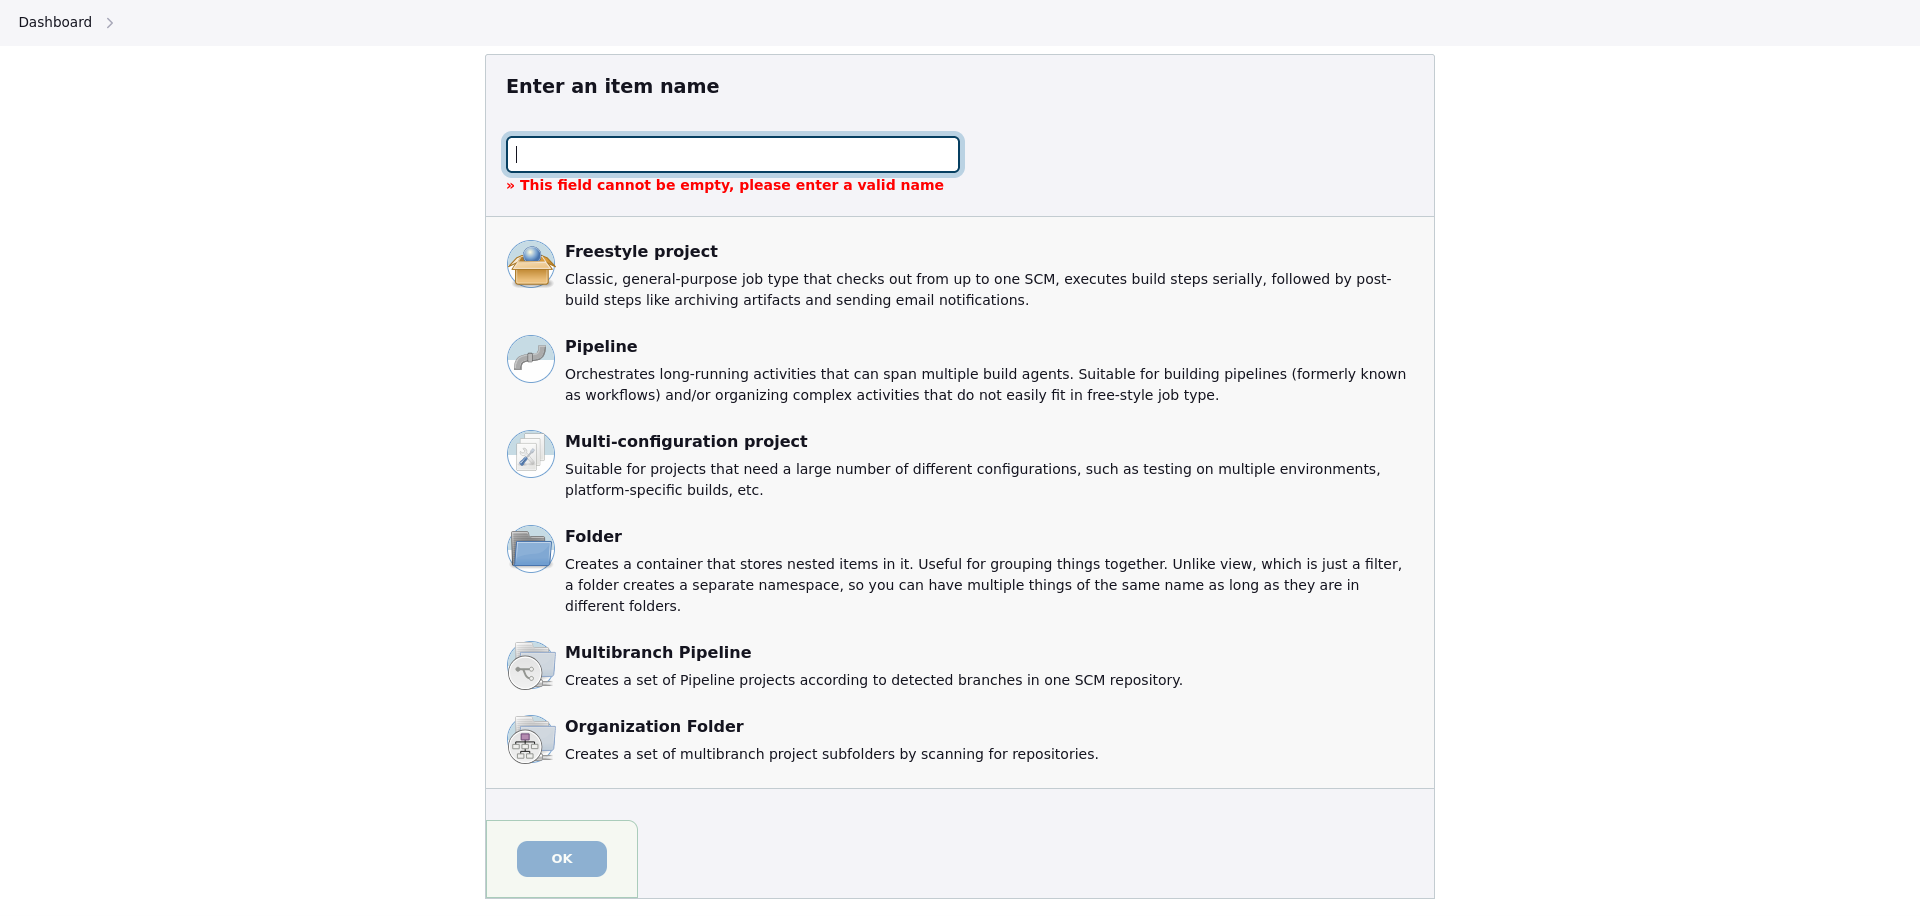
On the Jenkins Dashboard, select the “Create a job” button. For this tutorial, we are going for “Freestyle project”.


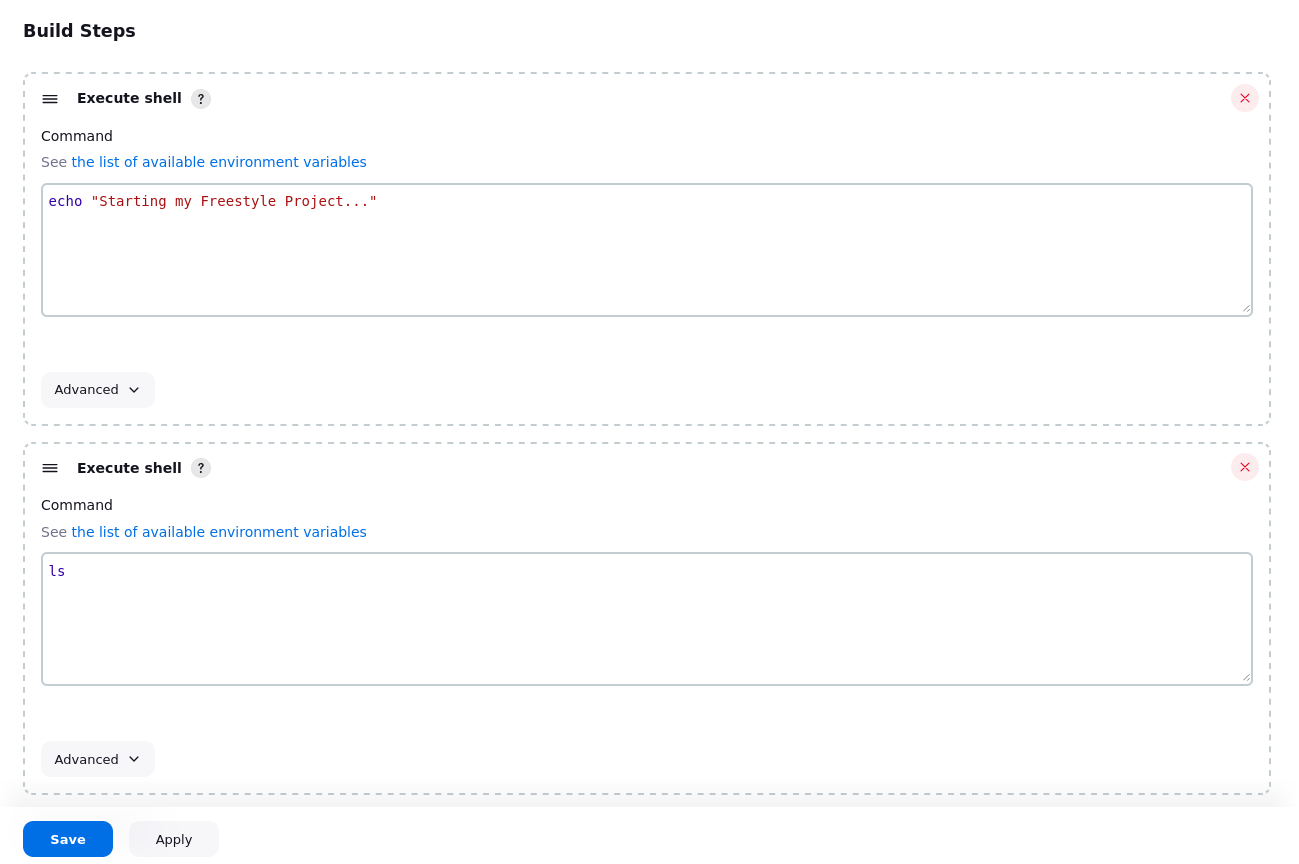
On the job’s configuration page, we can see how simple it is to configure a Freestyle Project job, as it doesn’t even require a Jenkinsfile. I will skip the Source Code Management with “None” set and declare simple shell commands on the Build Steps section.

We can now save, and manually run the test by clicking “Build now” button on left sidebar. We can see build history on this lef sidebar, select one individually and see it in more details.
On the a build page, we can see the Console Output, where the output of the commands are displayed.
Creating a pipeline
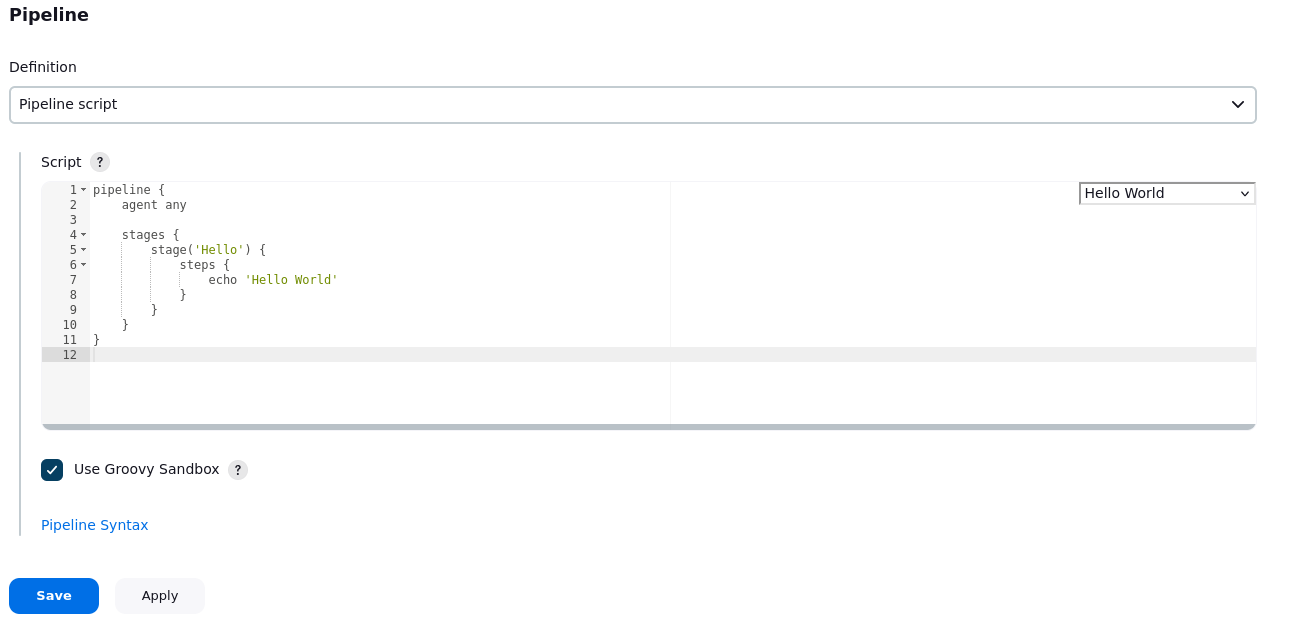
Let’s return to the Dashboard and select “New Item” on the left sidebar. This time we’ll create a Pipeline. This time you’ll notice that we are required to write a Groovy script for the pipeline, instead of just inserting bash commands.
On the “Pipeline” section, in the “Definition” selection, we can either choose to manually write the script from the Web Interface with “Pipeline” script option or read it from our SCM with “Pipeline script from SCM”. Let’s choose the former.
From the upper right corner of the Script window, we can select a template to begin with. I will stick with the Hello world template.

You can play around with echos (print a string) and sh (use a sh command), but if you want more complex
scripts, you can access localhost:[YOUR-JENKINS-PORT]/job/Pipeline/pipeline-syntax/. There, you can find
lots of documentations and also a Snippet generator where you can generate script segments through the
GUI.
Creating a Multibranch Pipeline for a real GitHub repository
After experimenting a bit with basic job management and Pipeline syntax, let’s configure a job for a real case scenario: integrating Jenkins with a GitHub repository, that will listen for new PRs and commits, and check them.
This will require the use of Jenkins’s GitHub Branch Source Plugin, which is probably installed by default on a regular install of Jenkins. Then, we have to set up the following:
- A GitHub App for the GitHub repository. It will allow third-parties (our Jenkins server) to read/write over our repository with the permissions set for the GitHub App. It can also listen to events in our repository and send webhooks;
- A Jenkins credentials containing the GitHub App private key. It allows Jenkins to read/write on the repository;
- A multibranch pipeline job for the corresponding repository automation.
Setting the Multibranch Pipeline
The first step is to create the GitHub App, configure it and create its Jenkins credential by following these steps
Then, create the Multibranch Pipeline. In Branch Sources section, choose to “Add source”. Associate the Pipeline with the repository by inserting the credentials and Repository HTTPS URL. You can validate if the configuration was successful by clicking on the “Validate” option
To set the pipeline steps for this new job, we will be required to write it in a Jenkinsfile and keep it in the repository. It will be read by Jenkins when it needs to start a new build.
With the Multibranch Pipeline, you will be able to make builds for each branch of the project if necessary.
Testing the Multibranch Pipeline
After setting it up and validating the Jenkins authentication through GitHub App, you can write a Jenkinsfile on the path specified for the job configuration. Write it using the same syntax previously seen on the regular Pipeline section.
If your Jenkins server is exposed to the internet and you have set https://<jenkins-host>/github-webhook/
on the WebHook URL for the GitHub App, the job should be automatically executed for branches that are commited
or pull requested.
Otherwise, you can manually run the scan through the Jenkins web interface. Go to the Job page and select to build it.
Final thoughts
We’ve covered so far the basics of Jenkins jobs, by trying some of Jenkins jobs types, covering Pipelines and their syntax for groovy scripting and applying that knowledge to set up a Multibranch Pipeline to automate builds for a GitHub repository.
I hope to talk about Jenkins agents next and cover some implementations I’ve been experimenting for the kworkflow CI I am working on and.
I will also prepare a blog post detailing the Jenkins as Code implementations for the kworkflow CI I am working on. It will cover this aspect of Jenkins with more in-depth details and also explain the progress I’ve made with my Jenkins as Code repository for kworkflow.